In graphics we was asked to chose a still life painting that had several objects in it, which we liked, to try and digitally interpritate on photoshop.
Painting I chose to recreate, by Georges Braques.
My digital version.
First of all I found images on the internet of each individual object in my chosen painting and also something to use for the background.


Then using the magic wand tool I selected the background from these images and deleted. Sometimes in was not possible to select all the background so I used the eraser tool to rub out some small parts.
I knew that there was no background to an image as it shows as a checkered background on photoshop.
Now that I had my chosen objects for the painting I need to edit each object to make it look as similar to the painting as possible.
I firstly did the skull and took screen shots to show how I did it.
For the skull I went into the filter gallery and chose the filter named Paint Daubs.
Then using the ordinary standard paint brush tool as well as some of the other brushes I painted around and onto different parts of the skull to make it look like the one in the painting by Braques. Finally I again went into the filters gallery and chose the Texturizer tool to give the texture of the skull like it is in the painting.
I was really pleased with how my skull turned out and I also found it quite easy and next I went onto the cross.
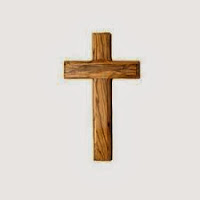
I opened the cross up in the filters gallery and again used the Paint Daubs filter.
Then using another paint brush tool I added on the brown marks.
Next I again used the Texturize tool in the filter gallery.
The cross was again quite simple and easy to edit and it didn't take much time either.
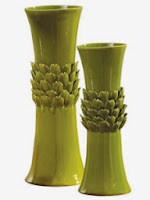
I then moved on to my final object of the green plant/vase.
This object was quite difficult to find on the internet and then also quite difficult to crop out its background. However I eventually did it and then edited it by using the Poster Edges filter.
Next using a paint brush tool I painted on the yellow marks. (I'm not sure why the screen shot is in black and white.)
Next using the I brought down the brightness and slightly increase the contrast.
Overall I found this object quite difficult to make in comparison to the other two as it was quite an unusual shape to reconstruct.
I opened up the original painting in photoshop and changed its size so that it would fit nicely onto an A4 page. Then one by one I added each object (including the back ground) on top of the original painting.
Next using the paint brush I used varies colours and painted in the different paint marks and splatter around the objects and then merged all the layers together ti make it into one image.
I am pleased with my overall image and apart from the green object I found reconstructing and edited the images quite easy and fairly fun. However I prefare creating my work by hand rather than on a computer as sometimes I get frustrated when I forget or can't do what I want.


No comments:
Post a Comment